
mattv
Member
Random bits of info (or how not to make the same mistakes I did)
This is just random bits of info I learned when I did this stuff:
I'm sure there's more, but I've been in a hot garage all day and am fried.
This is just random bits of info I learned when I did this stuff:
- New radiator
- PowerTRONIC ECU
- JRi shock
- Emissions removal
- Some other miscellaneous crap
- The airbox cover has two tabs towards the back that slip into slots on the airbox. Don't yank it out; I cracked the slots on my airbox doing that (yay)
- The front of the airbox rests on two rubber thingies that each have a bolt. The bolt on the left has a ground wire attached. Don't try to unscrew it. Mine just spun forever and twisted the gound wire. You don't need to remove it to take the airbox off (just lift the airbox off the rubber thingy)
- The bolts that the seat hooks onto, and go through a hole on the gas tank cover, aren't made of ubertanium. Don't over-torque'em. I snapped one (yay)
- Related to the previous point, use the approprate sized ratchet for the bolt(s) you're torquing. I was using a large one with an adapter (too much leverage)
- Don't over-torque the bleeder screw in your radiator; I stripped mine. Count turns if you have to.
- Related to the previous point, I actually stripped the threads with a trailtech temp gauge, not the stock screw, if that matters. Be careful if you have one.
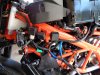
- The gas tank has two hose hookups on it; the right hose is a vent and/or emissions thingy. The left hose is your overflow. You can route these and the coolant overflow to the ground/bellypan. See attached pic.
- If you remove the cannister, you need to plug a vacuum port. Follow the hose.
- To remove the gas tank, you have to take out the battery and remove two nuts at the bottom of the battery box, two bolts towards the back of the tank. Now lift the back of the tank and stick a piece of scrap wood underneath it to prop it up. You can pull the fuel filter (I think that's what it is) out of it's cradle, disconnect the fuel line from it (press on green tabs), then disconnect the fuel pump (the only electrical connector going to the gas tank). I think that's it.
- When you go to put the gas tank back on, the tabs on the front should have a rubber grommet in them. I think the dealership lost one of mine at the first service. I folded up some self-amalgamating tape to make a rubber pad, cut it into a circle, then cut a hole in the center as a temporary fix. The tabs on the front of the gas tank go UNDER the battery box.
- When you're reinstalling fairings, keep the bolts/screws loose until they're ALL in place.
- Even if you don't want to mod your bike, I would still recommend replacing the radiator shroud with a real radiator guard. It makes it easier to get the fairings off, and provides better protection.
- If you want to replace the airbox with a pod filter, it's 54mm (intake is 55mm I think, 54mm filter fits well). You will need to cap a vacuum port on the cylinder head (it has an airbox hose running to it) and put a filter on the crankcase. Or you could cut the little box off the airbox that these hoses run to and leave them in place. Or maybe run a hose from the crankcase to the cylinder head with a filter inline.
- Here's why you don't want a pod filter: The intake is right above the exhaust pipe, it will be sucking in hot air. The airbox helps close off the tray under the seat, it's wide open without it. The airbox also helps keeps wires away from the exhaust pipe. Despite all that, I might try it again someday, because I'm a dumbass.
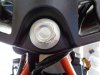
- Use a screwdriver with a plastic handle to remove/install the battery wire screws. I was using a ratchet and tapped the steering stem nut; sparks flew, scars were left (see attached pic)
- There's a tray under your seat. There's a tray under that tray. You can remove the first tray if you need more room in there.
- Get a parts tray or some old tupperware to organize all the bits and pieces that you take off this thing. There were more than I expected.
- The bolt on the bottom shock is a bitch. Remove your rear hugger and loosen the rest of the plastic stuff around there. Use a big torque wrench with an extension and an allen/hex head socket. Apply pressure toward the bolt while turning to make sure it doesn't slip out. You (or at least I) need leverage to remove this bolt smoothly.
- The cat is a pain in the ass to get out, but it does come out without removing other stuff. I think I tried it with the bike on the ground, on a rearstand, and also jacked up under the engine. It just took a lot of finagling.
- The injector connector has a tab on the UNDERSIDE you press to release it. I thought it was on the top and messed with it for way too long. It takes very little pressure to disconnect.
- If I had known the previous point, I probably could have installed the powertronic ECU by only removing the fairings. I ended up removing the gas tank to get a better look.
I'm sure there's more, but I've been in a hot garage all day and am fried.
Attachments
Last edited:


")